


I took some pictures of my Kydex Holsters I made. If you have ever thought about making a holster or mag pouches you should definitely try it out. It is fun and could possibly save you money. If you already have tools like a belt sander , band saw, drill press and clamps you will be better off. Oh and you got to be able to make your own foam press, jigs, and templates out of scrap wood to keep it on the cheap.
I have been a big fan of Bravo Concealment and their gear. They make really good stuff. It is a bit expensive and does add up for all my pistols. They are definitely well priced especially after seeing how much work it takes to make a holster. I am definitely not making a holster of their quality but I can say it has turned out to meet my satisfaction. I got most of the information from a guide on m4carbine.net and here is the link.
http://www.m4carbine.net/showthread.php?64714-How-to-make-a-Kydex-holster-Picture-Tutorial
I used knifekits.com for all my Kydex, rivets, and Chicago screws.
http://www.knifekits.com/vcom/index.php
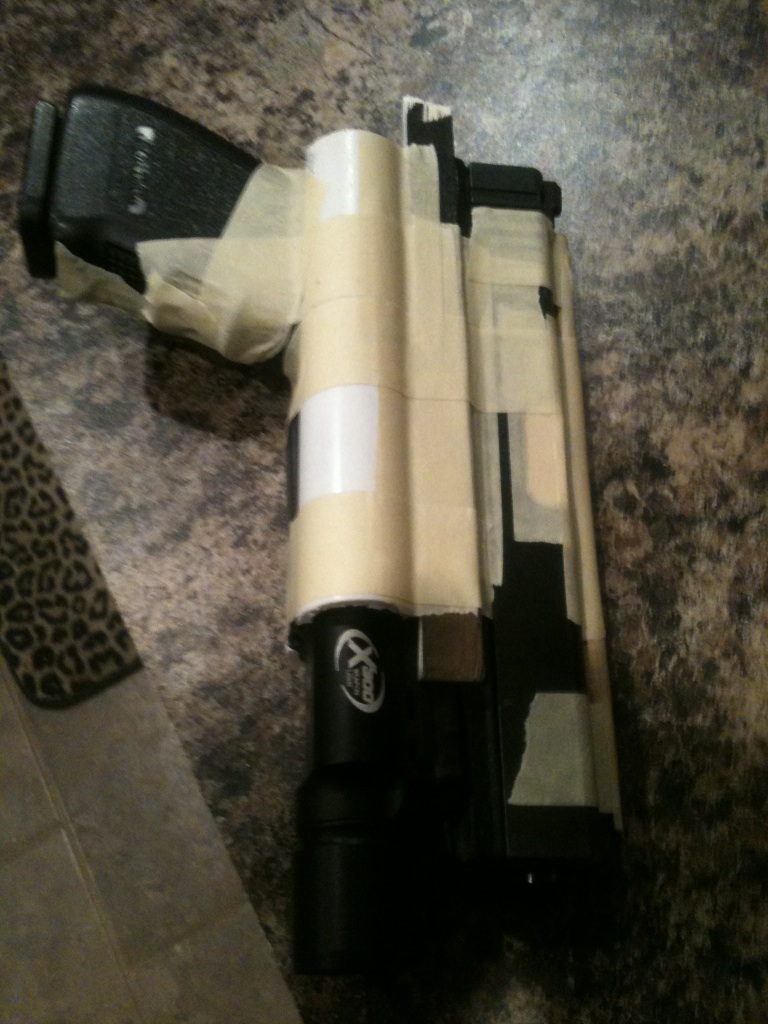
This is the pistol all taped up and ready for the mold. It can be a problem to use a polymer framed pistol. There is a chance of warping the pistol frame and problems can consist of magazines not dropping free. I had no issues with this but I would recommend using a blue gun unless you’re making this holster for a steel framed pistol/magazine.
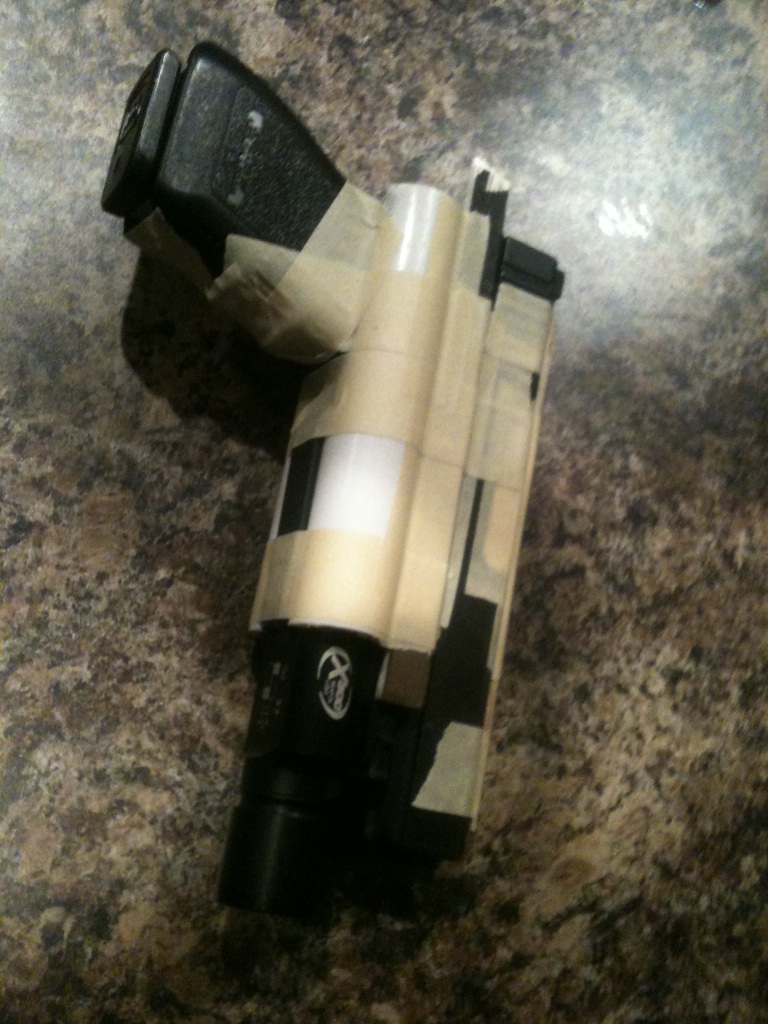
The channel for the weapon light is made using pvc to protect the area the light will need to move in and out of the holster. I also taped up the ejection port and used a dowel rod for the front sight channel.
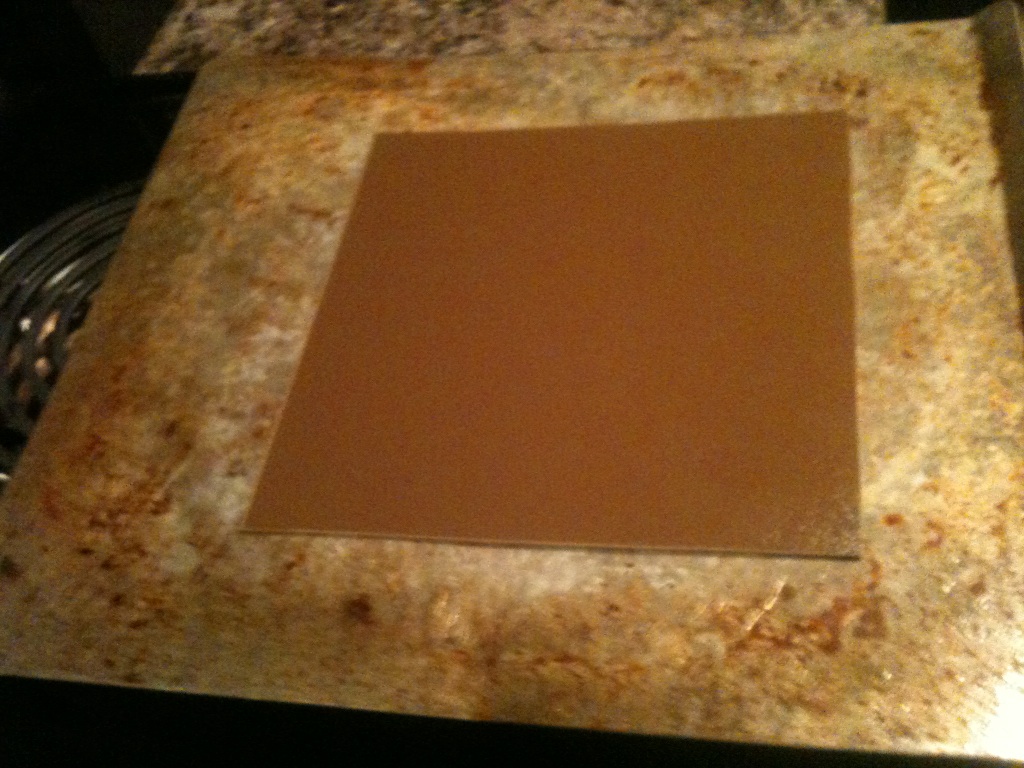
8”X8” cut out of .080 kydex for a Holster. Simple just cut with a box knife and leave excess 1 ½ “ to 2’’ on each side to work with. Once you scar the material it will separate when you bend it back and forth.
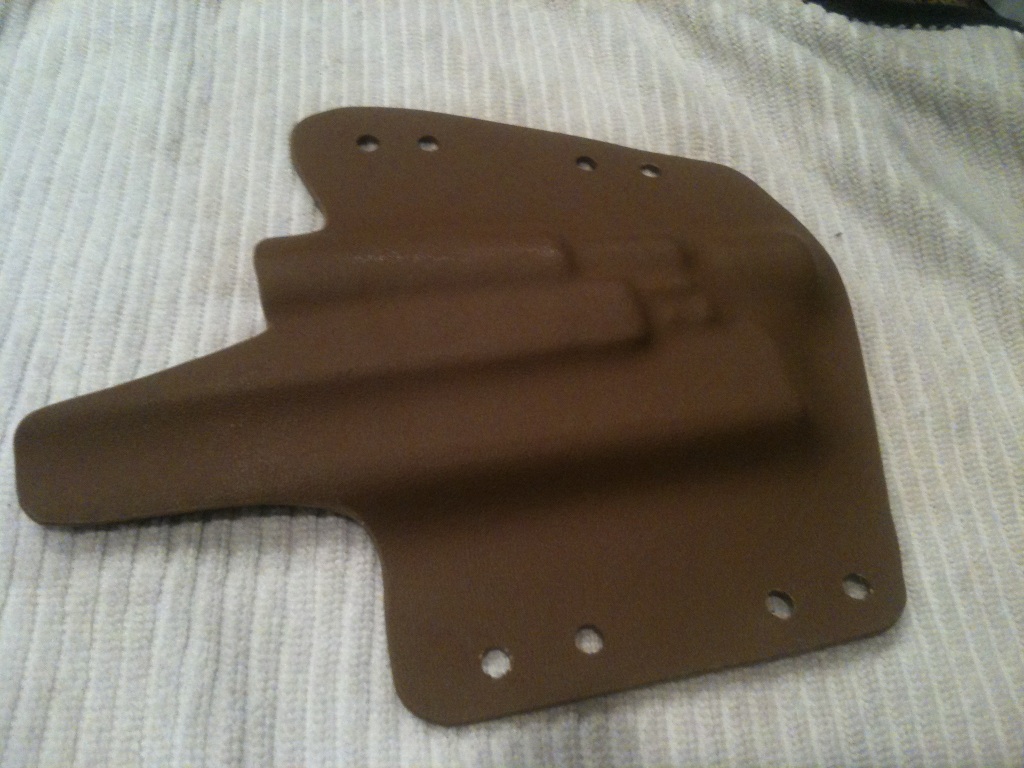
Back of holster after molded. The Information on m4carbine.net suggested to heat the kydex up at 350 degrees for 10 minutes. I ended up only leaving the material in for 8 minutes and it worked great. Different size of material and different ovens can cause different results

Back shape of holster.
Finished holster
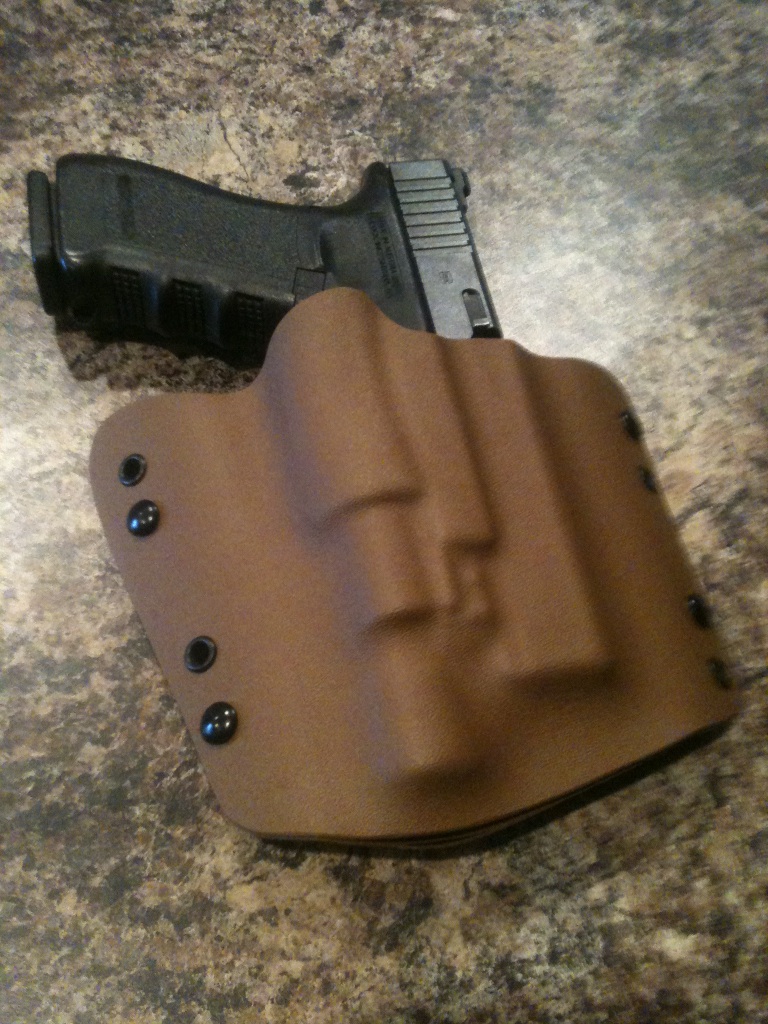
The retention on this holster turned out great and I had a blast making them. You can see by my alignment of my rivet/holes that I rushed things. Take your time it will show in your work.
I have been a big fan of Bravo Concealment and their gear. They make really good stuff. It is a bit expensive and does add up for all my pistols. They are definitely well priced especially after seeing how much work it takes to make a holster. I am definitely not making a holster of their quality but I can say it has turned out to meet my satisfaction. I got most of the information from a guide on m4carbine.net and here is the link.
http://www.m4carbine.net/showthread.php?64714-How-to-make-a-Kydex-holster-Picture-Tutorial
I used knifekits.com for all my Kydex, rivets, and Chicago screws.
http://www.knifekits.com/vcom/index.php
This is the pistol all taped up and ready for the mold. It can be a problem to use a polymer framed pistol. There is a chance of warping the pistol frame and problems can consist of magazines not dropping free. I had no issues with this but I would recommend using a blue gun unless you’re making this holster for a steel framed pistol/magazine.

The channel for the weapon light is made using pvc to protect the area the light will need to move in and out of the holster. I also taped up the ejection port and used a dowel rod for the front sight channel.

8”X8” cut out of .080 kydex for a Holster. Simple just cut with a box knife and leave excess 1 ½ “ to 2’’ on each side to work with. Once you scar the material it will separate when you bend it back and forth.

Back of holster after molded. The Information on m4carbine.net suggested to heat the kydex up at 350 degrees for 10 minutes. I ended up only leaving the material in for 8 minutes and it worked great. Different size of material and different ovens can cause different results

Back shape of holster.

Finished holster

The retention on this holster turned out great and I had a blast making them. You can see by my alignment of my rivet/holes that I rushed things. Take your time it will show in your work.
Last edited:


