I bedded my Rem 700 .308 SPS AAC this weekend. Just thought I'd share the process. It was plenty of fun and worked out ok.
Rifle specs:
Remington 700 .308 Tactical AAC-SD 1:10 twist (seems like it needs another key tacticool term in there doesn't it? lol... whatever)
I don't remember the brand, bit it has a 20 MOA base, TPS rings, and a Vortex Viper PST FFP scope.
I'm pretty happy with it, but if good enough is the occasional flyer ot WTF happened moment... I'm not happy with good enough.
I'm pretty sure that at 100 yards I can outshoot it with my AR, but that quickly changes when you get out to 300 yards or more.
Be forewarned, I'll rely on pictures heavily.
In this picture, you'll see my diagnosis of the rifle. It has always shot ok, but is a bit inconsistent at times and is really ammo picky. Sometimes 2 or 3 shots go in the same hole, but I've never finished a 10 shot string any better than 1 MOA.
Understand that it doesn't HAVE to be any better... I'm playing and having fun here.
I covered everything from 42 to 46 grains (10 shots each of 1 grain increments) to try to find a point where the barrel harmonics and velocity don't get along. If you click this picture and scroll left, you'll see the targets in order from least to most powder. I think I can see a pattern, but it is noisy data at best. It was a moderately windy day with wobbly targets, but I chose my timing wisely and this is pretty indicative of what this tool (and the gun) are capable of.

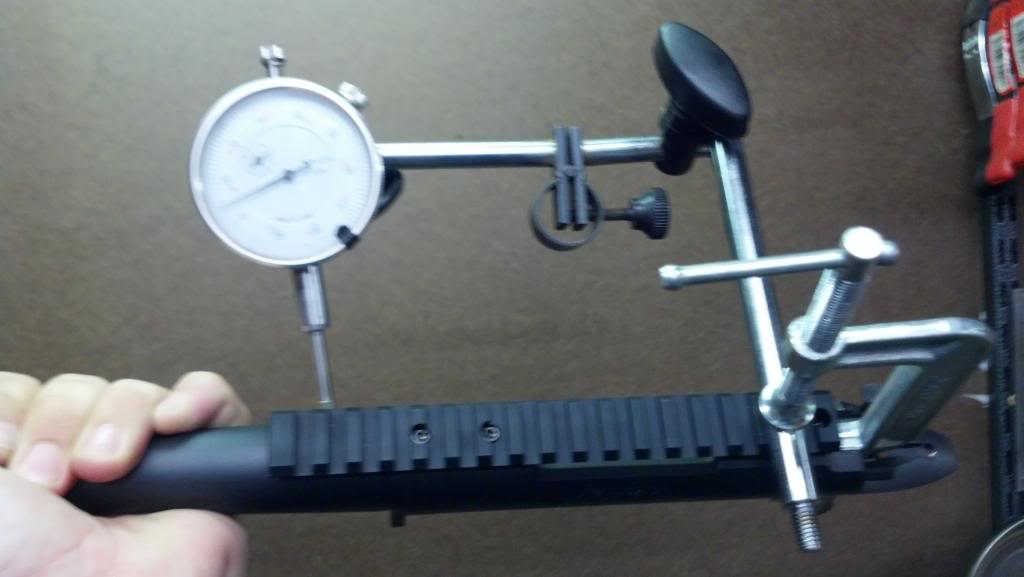
Terrible pic I know, but I did my best to measure the deflection in the receiver when I unbolted it. I set the dial indicator to zero and by the time the bolts were free, the needle measured about .003". In my opinion that's a bunch!
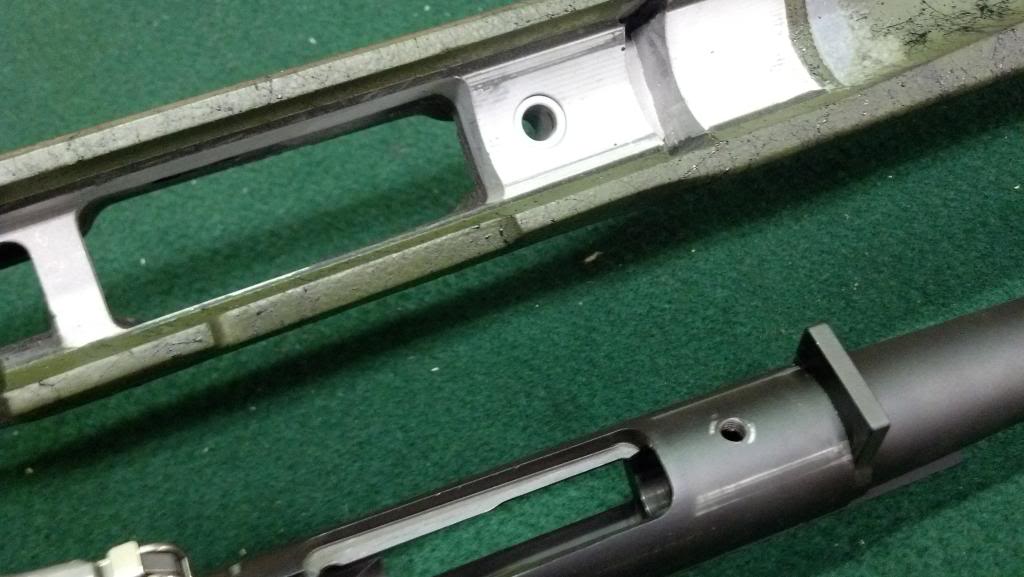
Why might that have happened? Well, just like you can read 100 other places on the net, the perfectly (within tolerance) machined stock, and perfectly (within some loose tolerances) machined action just don't always play nice.
Here you can see some uneven and pretty minimal contact between the two.
You know my decision already... I bedded that sucker. First I machined some pillar spacers. These are .050" thick to cause about .010" clearance all around the receiver. To get a better idea of what I did, and to see the lead I followed, go visit http://erniethegunsmith.com/catalog/i186.html
Not trying to advertise for the man, but I agree with his reasoning... in fact you can see my machined version here:

Fully free floated action, barrel and all. It only touches the pillars.

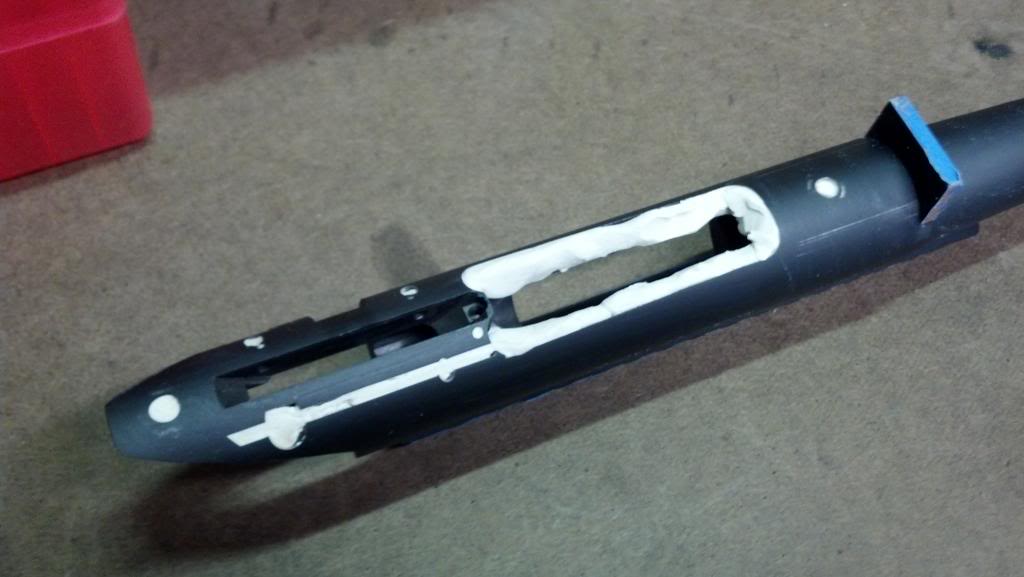
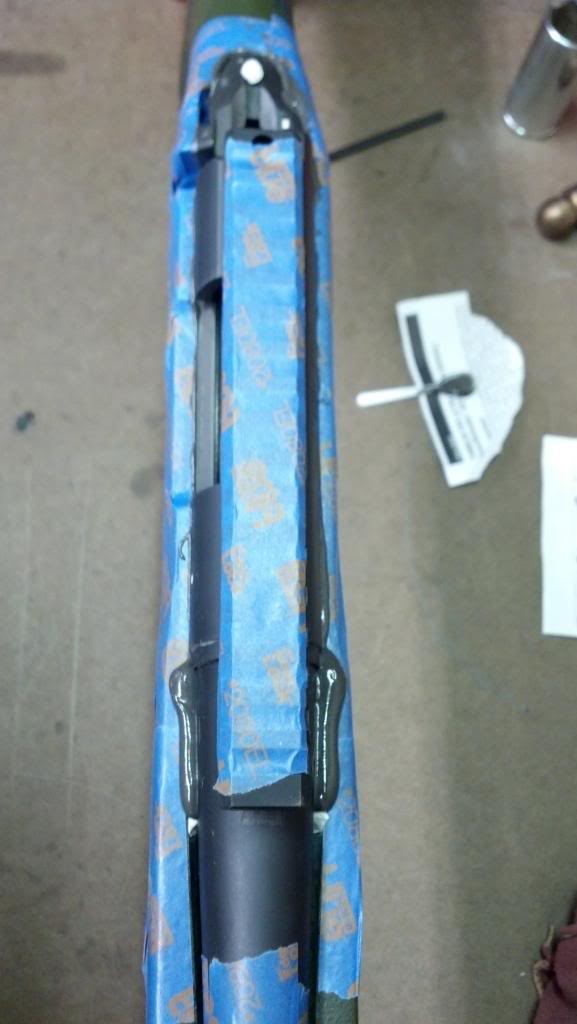
I taped the recoil lug with painter's tape. One layer on the front and sides, and 2 layers on the bottom for debris clearance.
I smashed clay into every hole and somehow that front hole still leaked before I got the screw in. I guess the devcon just pushed it out.
And I rubbed everything down very well with Kiwi shoe polish.
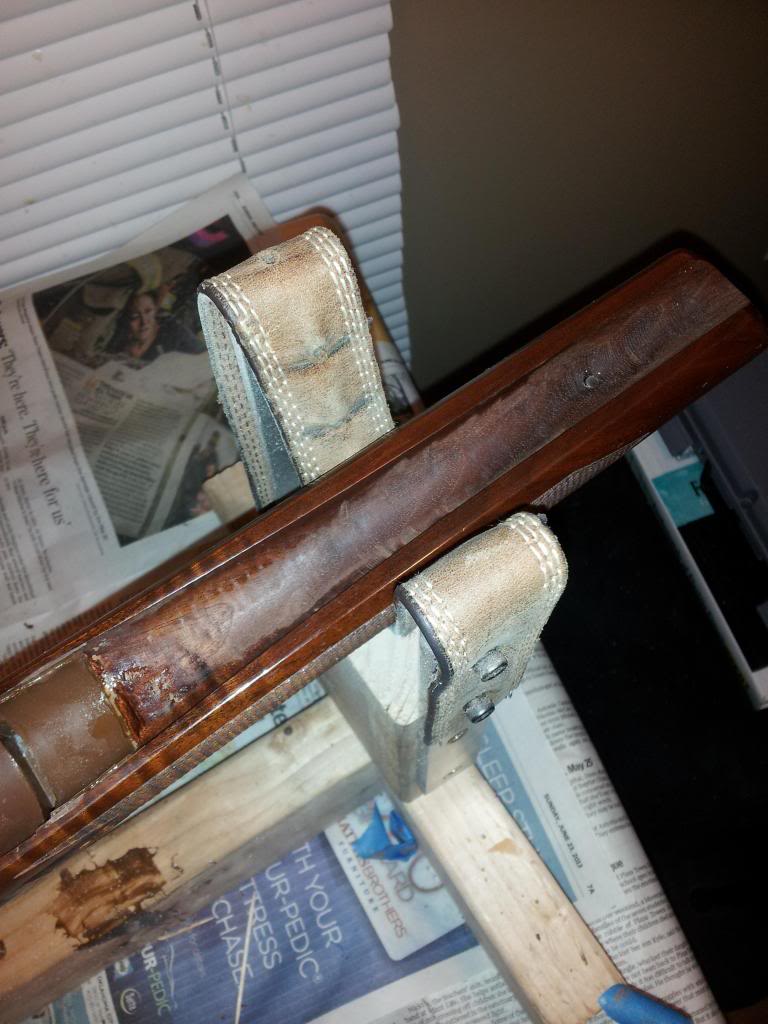
The stock needed to be cleaned, roughed up, and some material on the left side removed. It just plain wasn't a good fit.
I also taped areas most likely to get dirty.

I didn't have a great way to meter out how much hardener and epoxy I needed, so I resorted to the weight data in the package.
I just slopped some out until it looked good. At 1.75oz it seemed almost right, so a quick calculation tells me that I need to go to 1.9444oz to get the ratio right... Not sure why I took the photo here... but I'm almost there...

Glue in the pillars:

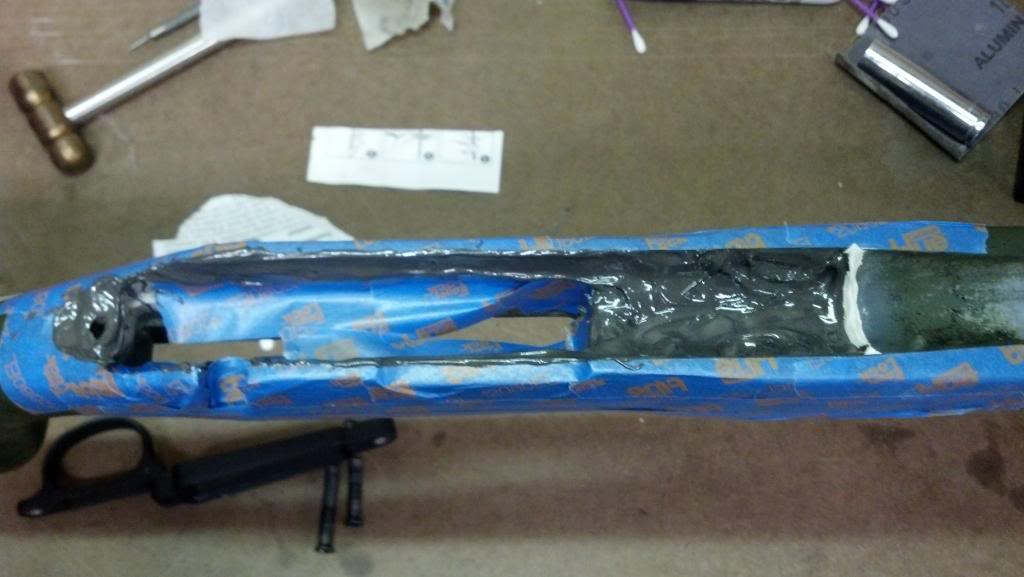
And it's time to smear that $50/lb junk all over! (For anyone trying to use this as instructions (i wouldn't) note the white clay dam at the front)
I then sat the action in and began the process of cleaning. This is by far the most time consuming part, but with a bit of WD-40 on a rag, it cleans off nicely.
Rifle specs:
Remington 700 .308 Tactical AAC-SD 1:10 twist (seems like it needs another key tacticool term in there doesn't it? lol... whatever)
I don't remember the brand, bit it has a 20 MOA base, TPS rings, and a Vortex Viper PST FFP scope.
I'm pretty happy with it, but if good enough is the occasional flyer ot WTF happened moment... I'm not happy with good enough.
I'm pretty sure that at 100 yards I can outshoot it with my AR, but that quickly changes when you get out to 300 yards or more.
Be forewarned, I'll rely on pictures heavily.
In this picture, you'll see my diagnosis of the rifle. It has always shot ok, but is a bit inconsistent at times and is really ammo picky. Sometimes 2 or 3 shots go in the same hole, but I've never finished a 10 shot string any better than 1 MOA.
Understand that it doesn't HAVE to be any better... I'm playing and having fun here.
I covered everything from 42 to 46 grains (10 shots each of 1 grain increments) to try to find a point where the barrel harmonics and velocity don't get along. If you click this picture and scroll left, you'll see the targets in order from least to most powder. I think I can see a pattern, but it is noisy data at best. It was a moderately windy day with wobbly targets, but I chose my timing wisely and this is pretty indicative of what this tool (and the gun) are capable of.

Terrible pic I know, but I did my best to measure the deflection in the receiver when I unbolted it. I set the dial indicator to zero and by the time the bolts were free, the needle measured about .003". In my opinion that's a bunch!

Why might that have happened? Well, just like you can read 100 other places on the net, the perfectly (within tolerance) machined stock, and perfectly (within some loose tolerances) machined action just don't always play nice.
Here you can see some uneven and pretty minimal contact between the two.

You know my decision already... I bedded that sucker. First I machined some pillar spacers. These are .050" thick to cause about .010" clearance all around the receiver. To get a better idea of what I did, and to see the lead I followed, go visit http://erniethegunsmith.com/catalog/i186.html
Not trying to advertise for the man, but I agree with his reasoning... in fact you can see my machined version here:

Fully free floated action, barrel and all. It only touches the pillars.

I taped the recoil lug with painter's tape. One layer on the front and sides, and 2 layers on the bottom for debris clearance.
I smashed clay into every hole and somehow that front hole still leaked before I got the screw in. I guess the devcon just pushed it out.
And I rubbed everything down very well with Kiwi shoe polish.

The stock needed to be cleaned, roughed up, and some material on the left side removed. It just plain wasn't a good fit.
I also taped areas most likely to get dirty.

I didn't have a great way to meter out how much hardener and epoxy I needed, so I resorted to the weight data in the package.
I just slopped some out until it looked good. At 1.75oz it seemed almost right, so a quick calculation tells me that I need to go to 1.9444oz to get the ratio right... Not sure why I took the photo here... but I'm almost there...

Glue in the pillars:

And it's time to smear that $50/lb junk all over! (For anyone trying to use this as instructions (i wouldn't) note the white clay dam at the front)

I then sat the action in and began the process of cleaning. This is by far the most time consuming part, but with a bit of WD-40 on a rag, it cleans off nicely.