


Hey guys...I recently picked up a Remington M1903 that required some stock fitting and a minor repair due to a chip at the tang. I'm sure most of you have encountered at least one firearm with similar damage so I figured I'd post up a how-to for a minor chip repair. This doesn't how-to doesn't apply to more serious tang cracks or splits only minor cosmetic blemishes. This was my first attempt at this type or repair and it is fairly simple. The basic steps below will pretty much apply to any splice repair on any portion of a stock as long as it is not an area prone to direct recoil (areas that are to be exposed to direct recoil will require a stronger bonding agent like Acraglas or Devcon epoxy). I've done quite a few minor stock repairs, but I am not or have I ever claimed to be a woodworker so take my advice with a grain of salt. 
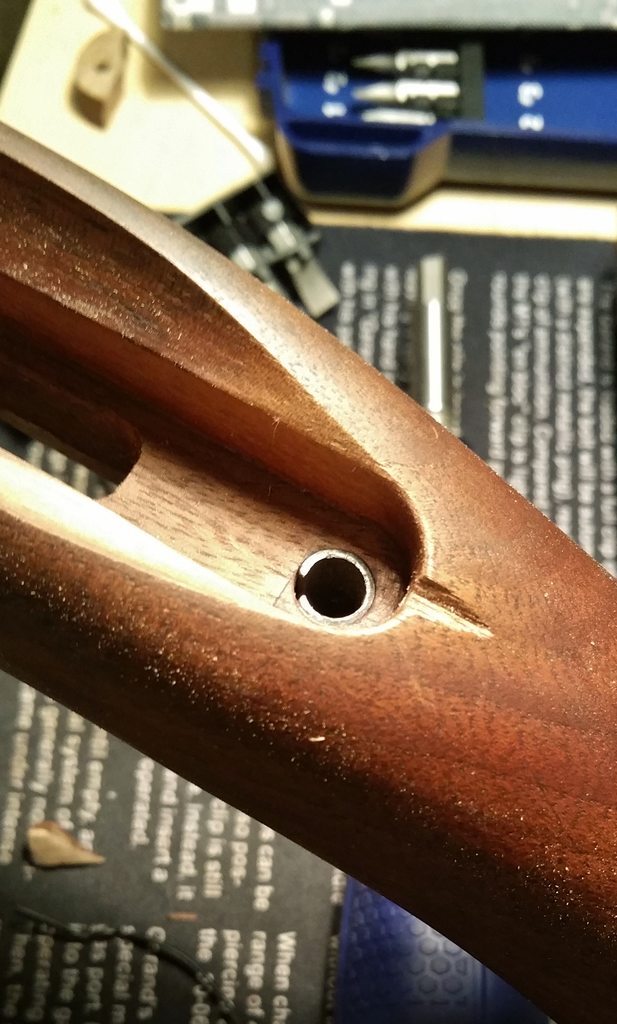
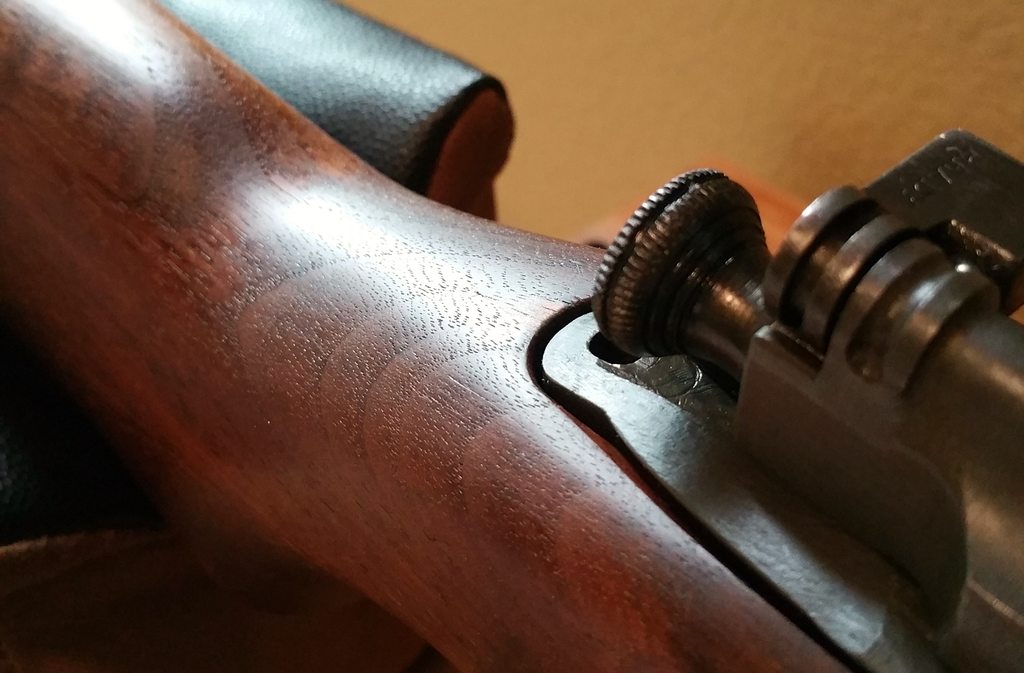
Here is the stock as found. The chip was minor and was caused by forcing the action into the stock without properly inletting the tang area first. 1903's are particularly vunerable to damage in this area and must not have tang to wood contact. The tang acts like a wedge upon recoil and easily splits or chips the stock. Luckily the rifle did not appear to have been shot with the stock installed or there would have been much more significant damage to the wood.
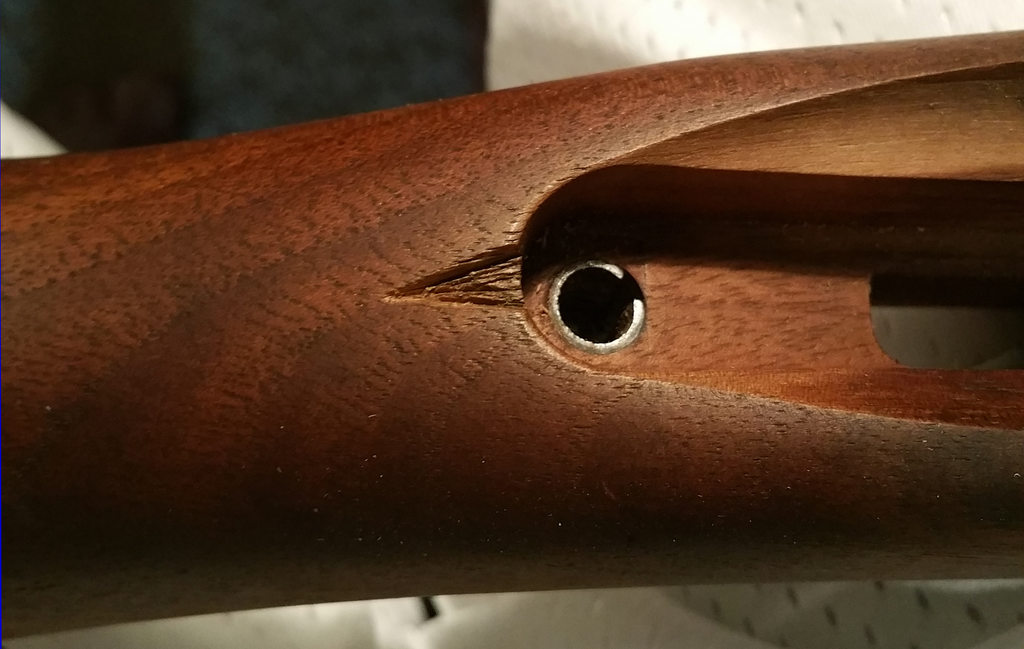
The first step is to clean up the area that requires repair. I cut the area slightly more symetrical and scored the surrounding areas, hoping for a better bonding surface. After doing so, I cleaned the area well with acetone to remove any oils that would affect the glue bond. It is difficult to see in the photo, but the left side cut follows one of the rays in the wood's grain. This will help hide the repair and for it to appear slightly more natural after being stained.
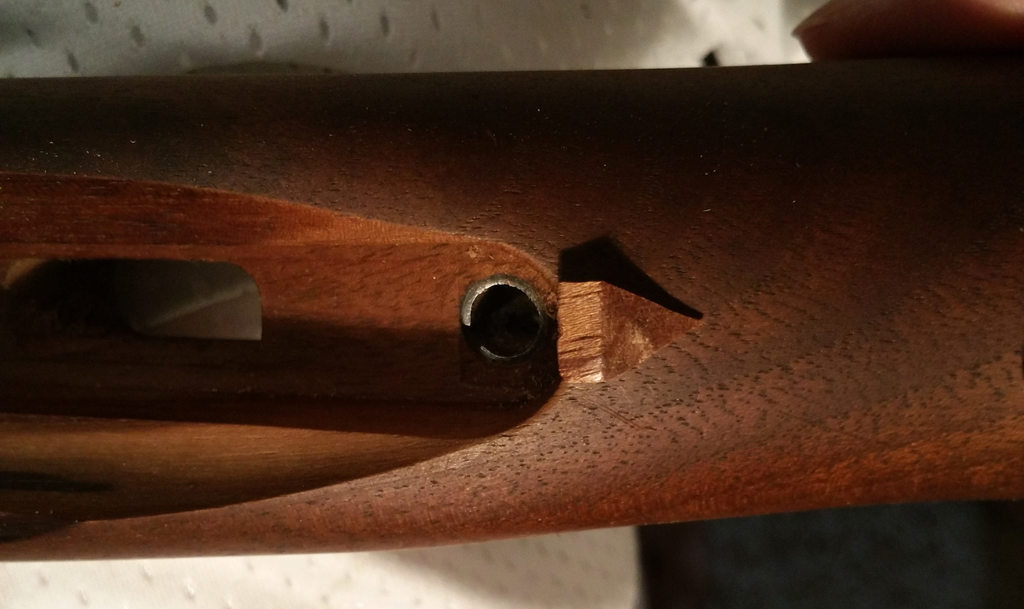
The next step is to cut the an appropriate sized piece of wood to use for the splice repair. In this case I used a piece of a spare repro M1A1 grip that I had on hand. Black walnut would have been better, but the grain was similar enough that it isn't obvious. The grip was made in Korea so I have no idea what species of wood it was. After choosing the wood for your splice material, form a dovetail that fits the damaged area on the stock. Be sure to leave the wood above the surface oversized...this will help blend the repair and lessen the appearance of any glue line that might be present. Coat the areas surrounding the repair with wax as this will prevent any adhesive that leaks from the repair from soaking into the surrounding grain. After doing so, apply the bonding agent to the stock and the splice material and clamp in place. In this instance I used Gorilla Glue. The foaming action allows it to penetrate and bond very well. It also stains fairly easily which is a plus...I just don't recommend using it on any recoil bearing surface because it would eventually fail, just like any wood glue.
After allowing to bonding agent to fully cure, shape the splice material to the stock. I used a combination of Dremel attachments, wood files, and moved to a sanding block as the finishing step. Be slow and patient...you can't put wood back on so focus on using hand tools over the Dremel when possible.

After dressing the repair, stain the repair and surrounding area to match (remove any remaining wax with acetone before doing so). I typically hand-mix alcohol based stains with RIT dye so that I can get the exact color that I'm after. In this case the splice material was not very accepting of stain (oil or alcohol based). If it had been the repair would have been pretty much undetectable. As it sits the splice can still be seen from certain angles, but is otherwise pretty unnoticeable after finishing the area with pure dark tung oil from Real Milk Paint.
Here is the stock as found. The chip was minor and was caused by forcing the action into the stock without properly inletting the tang area first. 1903's are particularly vunerable to damage in this area and must not have tang to wood contact. The tang acts like a wedge upon recoil and easily splits or chips the stock. Luckily the rifle did not appear to have been shot with the stock installed or there would have been much more significant damage to the wood.
The first step is to clean up the area that requires repair. I cut the area slightly more symetrical and scored the surrounding areas, hoping for a better bonding surface. After doing so, I cleaned the area well with acetone to remove any oils that would affect the glue bond. It is difficult to see in the photo, but the left side cut follows one of the rays in the wood's grain. This will help hide the repair and for it to appear slightly more natural after being stained.
The next step is to cut the an appropriate sized piece of wood to use for the splice repair. In this case I used a piece of a spare repro M1A1 grip that I had on hand. Black walnut would have been better, but the grain was similar enough that it isn't obvious. The grip was made in Korea so I have no idea what species of wood it was. After choosing the wood for your splice material, form a dovetail that fits the damaged area on the stock. Be sure to leave the wood above the surface oversized...this will help blend the repair and lessen the appearance of any glue line that might be present. Coat the areas surrounding the repair with wax as this will prevent any adhesive that leaks from the repair from soaking into the surrounding grain. After doing so, apply the bonding agent to the stock and the splice material and clamp in place. In this instance I used Gorilla Glue. The foaming action allows it to penetrate and bond very well. It also stains fairly easily which is a plus...I just don't recommend using it on any recoil bearing surface because it would eventually fail, just like any wood glue.
After allowing to bonding agent to fully cure, shape the splice material to the stock. I used a combination of Dremel attachments, wood files, and moved to a sanding block as the finishing step. Be slow and patient...you can't put wood back on so focus on using hand tools over the Dremel when possible.
After dressing the repair, stain the repair and surrounding area to match (remove any remaining wax with acetone before doing so). I typically hand-mix alcohol based stains with RIT dye so that I can get the exact color that I'm after. In this case the splice material was not very accepting of stain (oil or alcohol based). If it had been the repair would have been pretty much undetectable. As it sits the splice can still be seen from certain angles, but is otherwise pretty unnoticeable after finishing the area with pure dark tung oil from Real Milk Paint.
Last edited:


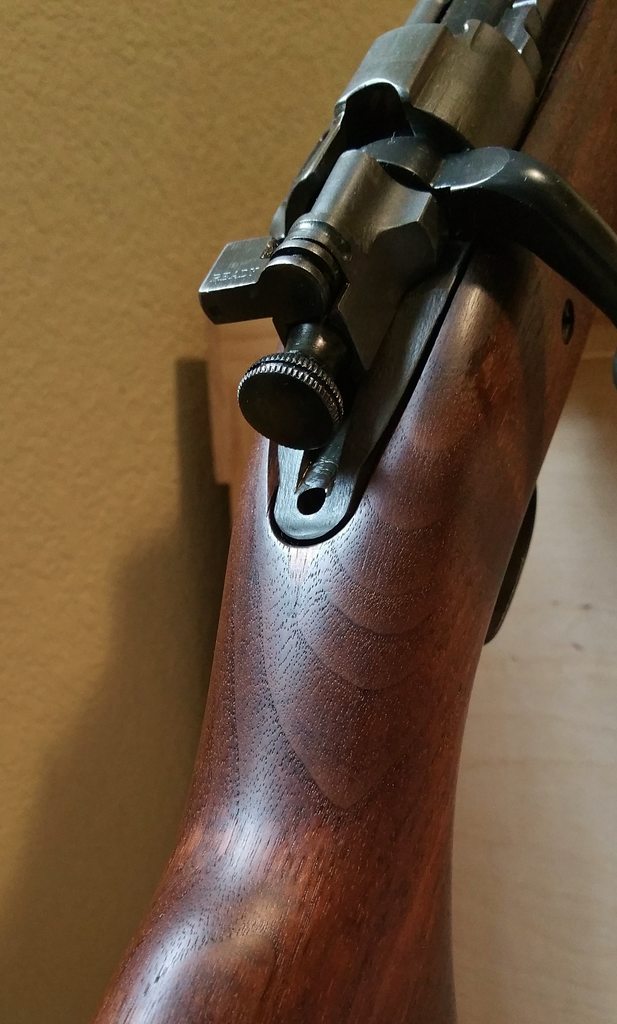
") ), and applying some coats of pure dark tung oil, the rifle looks really nice. I'm just waiting on a buttplate and rear sling swivel to arrive in the mail so that I can finish the rifle and take some photos. Since the stock isn't correct I didn't bother replacing the buttplate with a Remington part...I'm installing a M1922 heavy checkered no-trap buttplate instead since they are much nicer for shooting.
), and applying some coats of pure dark tung oil, the rifle looks really nice. I'm just waiting on a buttplate and rear sling swivel to arrive in the mail so that I can finish the rifle and take some photos. Since the stock isn't correct I didn't bother replacing the buttplate with a Remington part...I'm installing a M1922 heavy checkered no-trap buttplate instead since they are much nicer for shooting.