How to build an AK: Cheapskate edition

This site may earn a commission from merchant affiliate links, including eBay, Amazon, and others.

n8thegr8

Sharpshooter
Special Hen
Joined
Feb 16, 2009
Messages
3,654
Reaction score
3
Location
Oklahoma City
It worked beautifully! And this happened...

img.tapatalk.com_d_14_07_05_gate4a4u.jpg


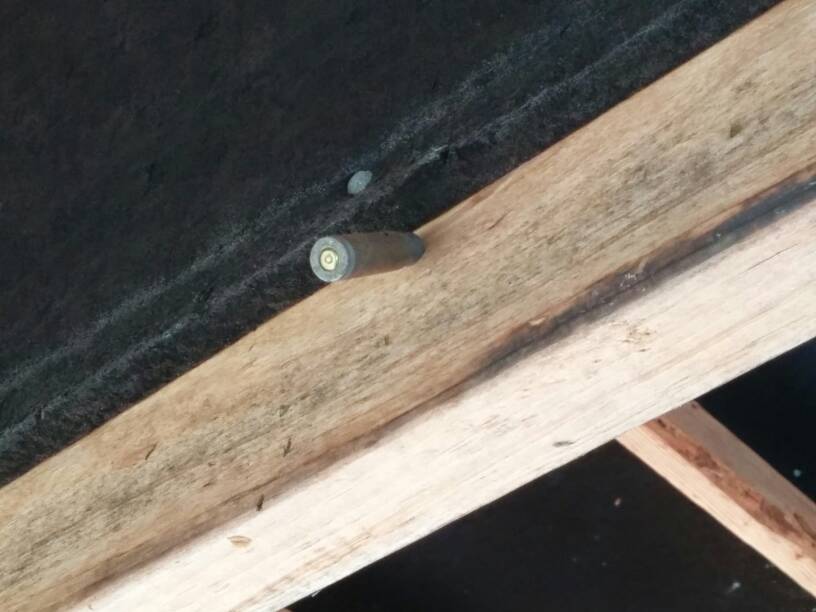
One of the ejected cases stabbed into the wood rafter of the range cover, lol. Those things fly!
 

JoLee1868

Marksman
Special Hen
Joined
Jun 14, 2014
Messages
36
Reaction score
0
Location
OKC/Tulsa
Nice work! Me, my father, and his friend went in on 3 Romy-G part kits and built ours. Luckily the friend had a press he bought specifically for the project. It was a great learning experience seeing how simply but mechanically genius the AK is. Definitely the most rewarding way to own an AK!
 

n8thegr8

Sharpshooter
Special Hen
Joined
Feb 16, 2009
Messages
3,654
Reaction score
3
Location
Oklahoma City
Thanks! It's definitely rewarding.

In the spirit of cheapskating, I'm almost done building a sand blasting cabinet out of a rubbermaid tub. I'll post some pics when it's done. I'm hoping to have it blasted and shoot it with a coat of high-temp engine enamel this week to keep the rust off. I may strip it again and parkerize it at some point in the future, but for now I just want to be done with it and enjoy shooting it for a while.
 

n8thegr8

Sharpshooter
Special Hen
Joined
Feb 16, 2009
Messages
3,654
Reaction score
3
Location
Oklahoma City
Haha, redneck engineering at its finest

Blasted and painted the rifle and dust cover tonight, just got to do the gas tube and selector tomorrow. I'll post pics in a week after it cures. I don't expect a lot of durability out of it, but looks good for now and should keep the rust off for a while.
 

n8thegr8

Sharpshooter
Special Hen
Joined
Feb 16, 2009
Messages
3,654
Reaction score
3
Location
Oklahoma City
Thought I'd post this while waiting for the paint to cure. I used these for pressing on the barrel components after I installed the barrel, just some 3/4 pipe nipples and unions, with a brass nipple so as not to mar the components or barrel.

img.tapatalk.com_d_14_07_20_adevabe4.jpg
 

n8thegr8

Sharpshooter
Special Hen
Joined
Feb 16, 2009
Messages
3,654
Reaction score
3
Location
Oklahoma City
I'm getting ready to start my own, any pointers or good inter web sites?

The gunsmithing section on akfiles.net is probably your best resource (beware the general discussion, lots of crazies in there, even by OSA standards, lol).

The trickiest part is getting the barrel and all its components lined up and pinned. I riveted in the trunnion before messing with the barrel, so I headspaced the barrel and pinned it, then pressed on the rest of the components and aligned them. Some people do all the components first, then press on the assembly. Some people headspace the barrel to the trunnion before riveting it, then remove it and reinstall after riveting. I think the way I did it is by far the easiest.

Press on the RSB aligned with the ears on top of the trunnion, and until you have a good fit with the dust cover.

Press on the Gas Block until you get a snug fit with the gas tube, check the gas path with a piece of copper wire to make sure it goes into the bore.

you can tie a piece of string to one of the stock holes in the rear trunnion, and run it to the front site to check alignment, and using an angle finder helps A LOT.

Take your time, go slow, and check everything along the way over and over again. It's really easy to get carried away and mess something up (Bending a barrel and cutting into the trunnion in my case, lol).

Use plenty of cutting oil when cutting the channels and anti-seize on the press fit components.
 

Latest posts

Top Bottom